# Cybersecurity Home Lab
### Lab Introduction
Building a home cyber lab is important because it provides a practical environment for developing cybersecurity skills, experimenting with tools and techniques safely, and enhancing education and training.
This lab is inspired by Day of Cyberwox Acadamy.
{% embed url="" %}
The purpose of this project is to setup the cyber home lab. Additional projects using the lab will come later.
#### Technologies Used
* VMware Workstation
* pfSense Firewall
* Security Onion
* Splunk
* Ubuntu Desktop and Server
* Windows Server 2019 (Active Directory)
* Windows 10
* Kali Linux
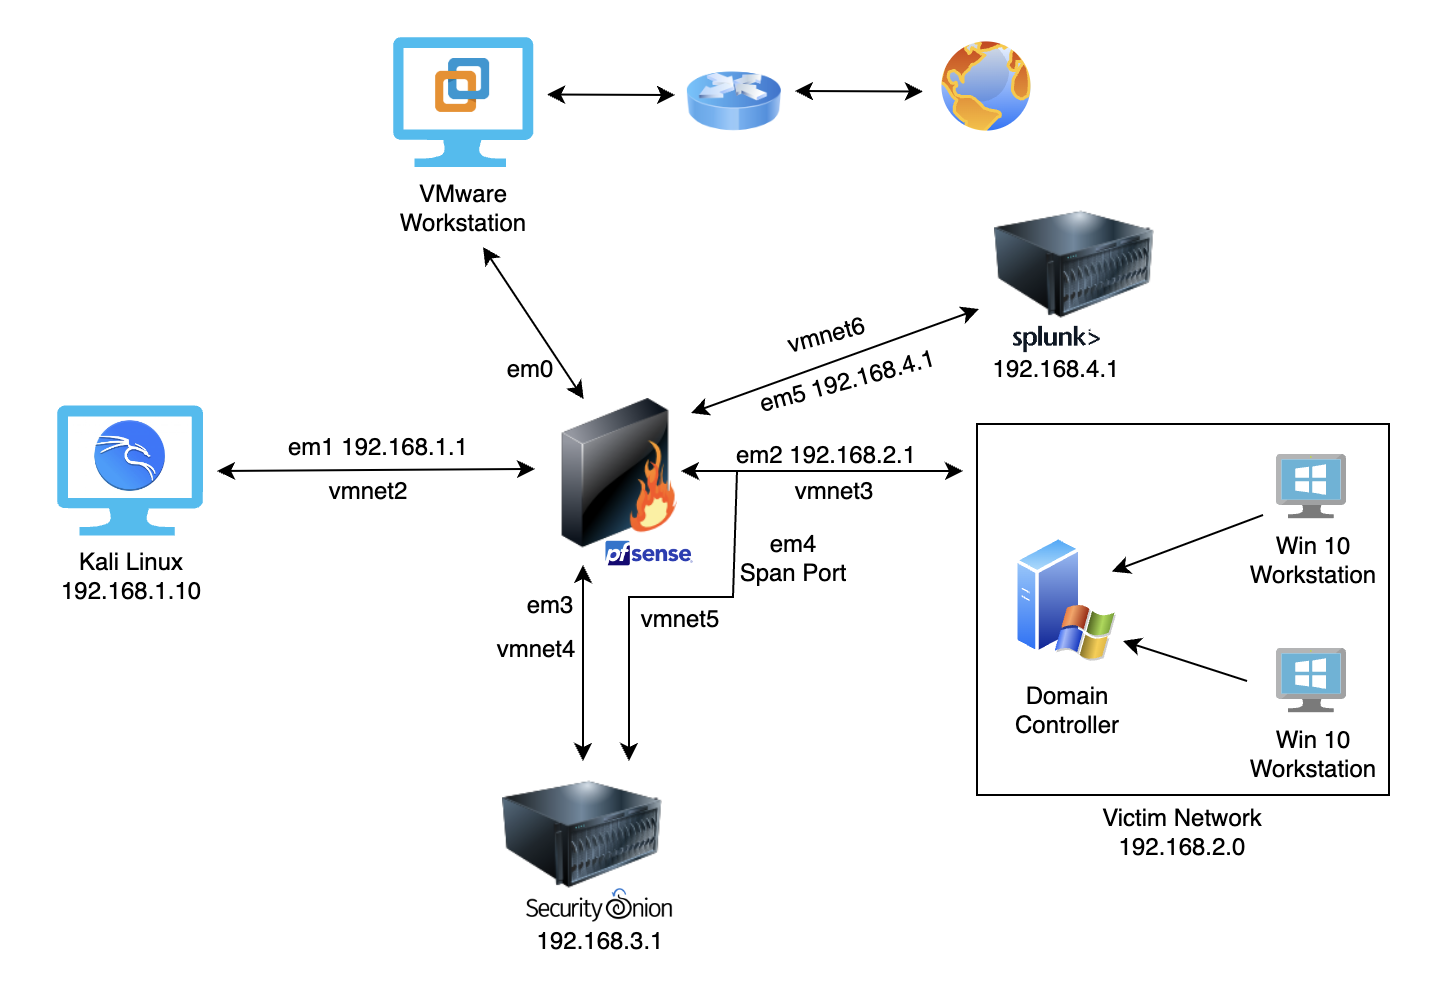
#### Network Diagram
### Part 1 - pfSense
You are welcome to use any hypervisor for this lab. I am personally using VMware Workstation.
For Part 1 of the lab, pfSense will be configured as the firewall and used to segment the network. Below is a link to download the pfSense iso file.
{% embed url="" %}
Once the download finishes, navigate to the hypervisor application and create a new machine.
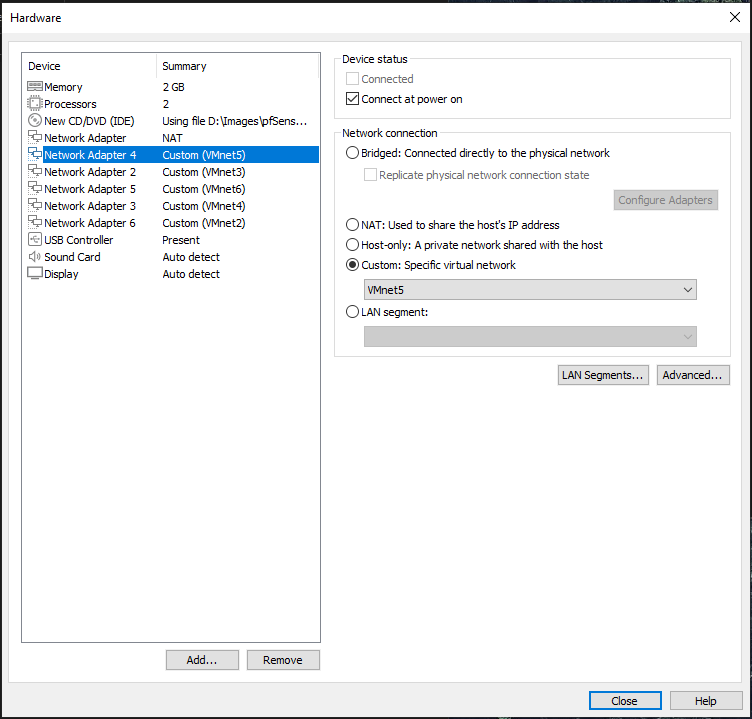
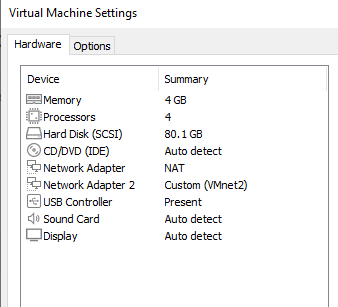
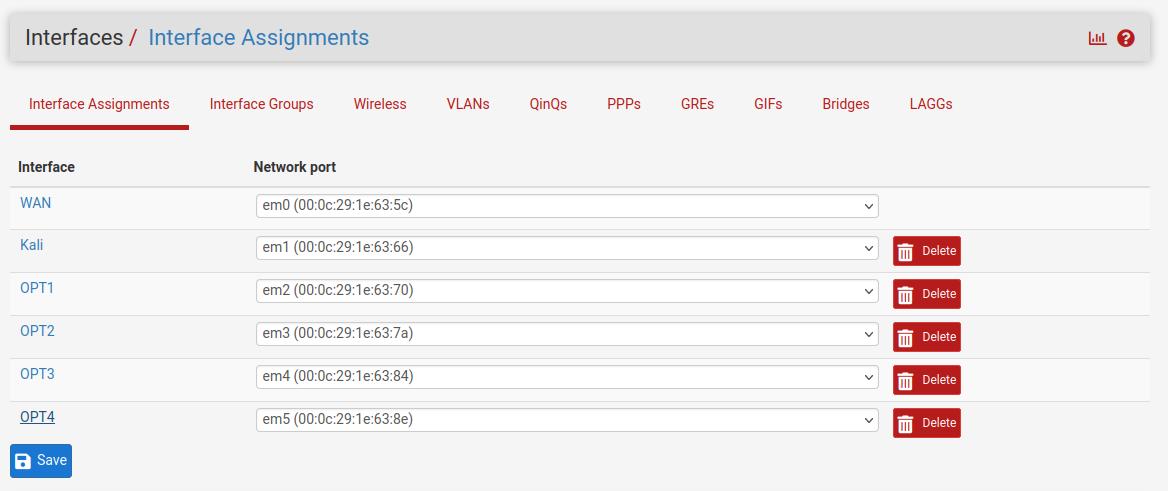
Navigate to Customize Hardware
Add 5 additional network adapters. These will be used for network segmentation.
The table below provides a summary of each interface.
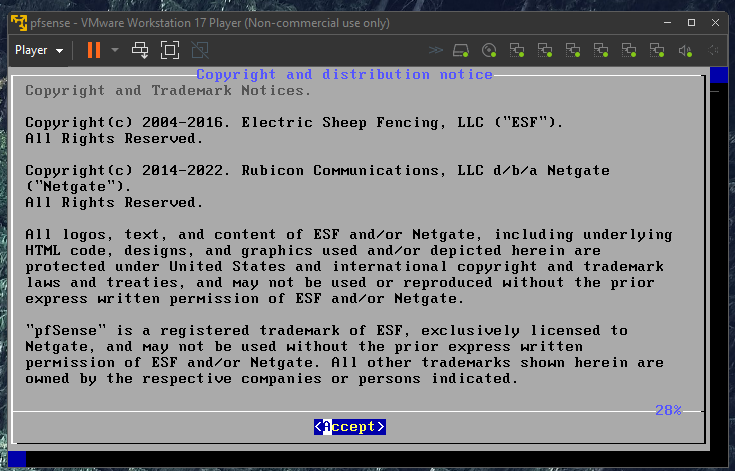
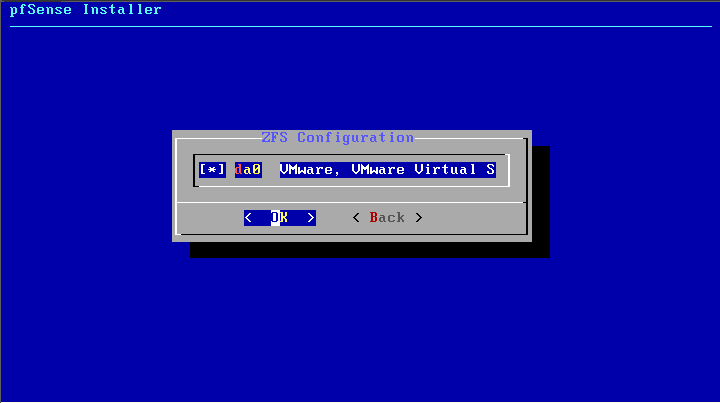
Power on the pfSense machine and accept the defaults.
After the machine completes the installation, the pfSense interface will appear.
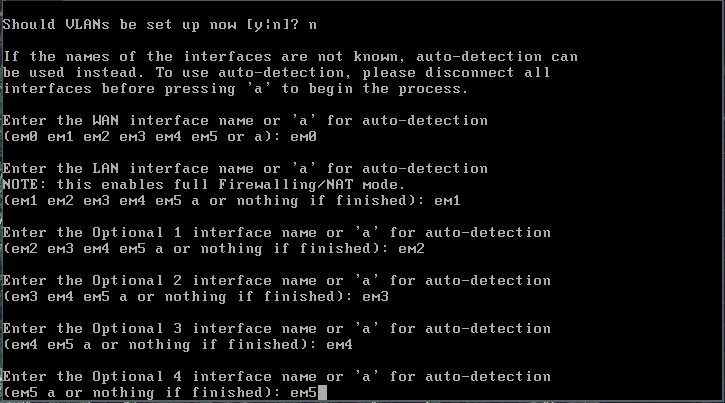
Enter option 1 and configure the interfaces.
*Should VLANs be set up now \[y:n]? n*
*Enter em0 em1 em2 em3 em4 em5*
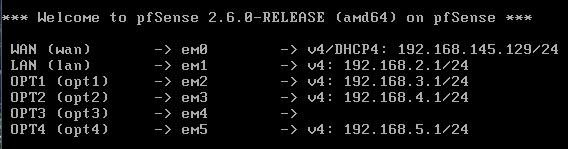
After responding to the prompts for each interface, pfSense will provide a list of assigned interfaces.
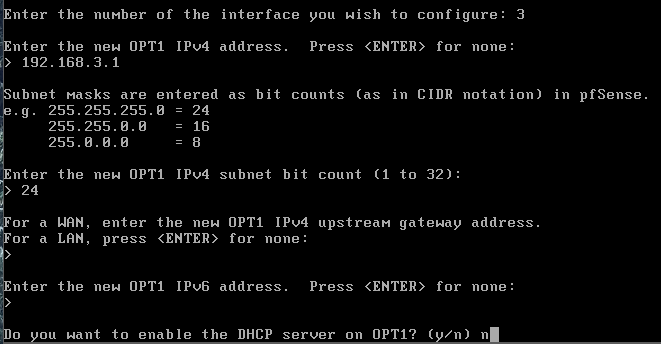
Next, configure the interface IP addresses. At the home menu, enter option 2. The interfaces will be configured based on the list below:
* LAN (em1) - 192.168.2.1
* OPT1 (em2) - 192.168.3.1
* OPT2 (em3) - 192.168.4.1
* OPT3 (em4) - blank
* OPT4 (em5) - 192.168.5.1
The LAN will be used to access the web interface for pfSense.
OPT1 configuration
OPT2 configuration
\*Note: OPT3 will not be assigned an IP address since it will have a span port for Security Onion.
OPT4 configuration
After configuring the interfaces, ensure the table is correct.
#### pfSense Web Interface
Now that the pfSense firewall is configured, log in to the web interface.
Download Kali Linux
{% embed url="" %}
Create the VM and add a network adapter to the machine. Connect the adapter to VMnet2.
Boot up Kali and follow the instructions.
The default login credentials are kali / kali. The password can be changed using the`passwd` command in the CLI.
Open up Firefox and navigate to 192.168.2.1. This is the web interface for the pfSense firewall.
Click Advanced > Accept the Risk and Continue
Login to the pfSense console.
The default login is admin / pfsense
You will be presented with a pfSense Setup Wizard.
Configure the general pfSense parameters.
* Primary DNS Server: 8.8.8.8
* Secondary DNS Server: 4.4.4.4
On the next page, untick the Networks.
pfSense Wizard is complete.
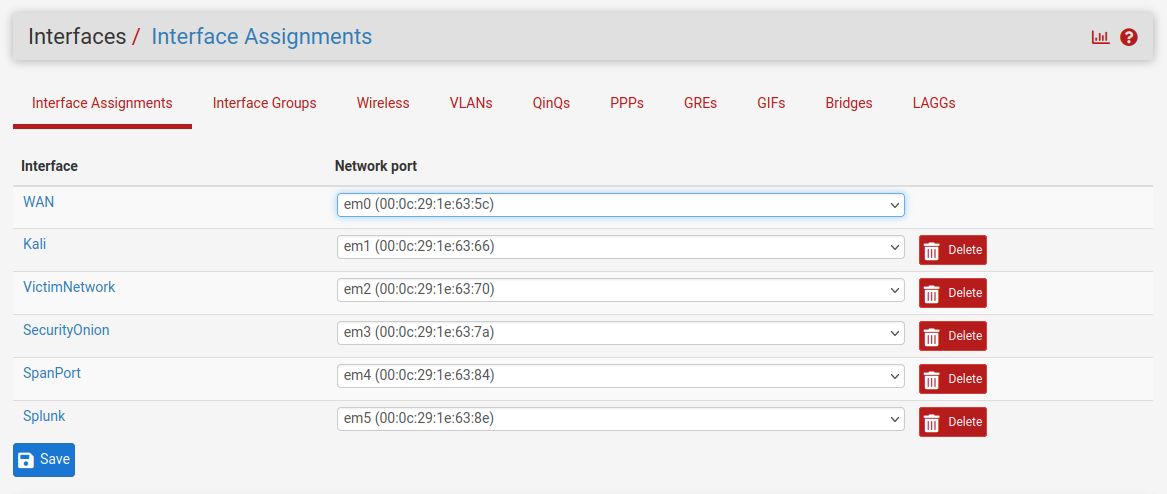
Next, the interfaces will be configured. Navigate to the Interfaces tab at the top of the page.
Select LAN (em1)
Rename this interface to Kali.
Do the same for the others (OPT1, OPT2, OPT3, OPT4).
The final interface list should look like this:
\*Note: Check the box next to "Enable Interface" for OPT3 or the SpanPort.
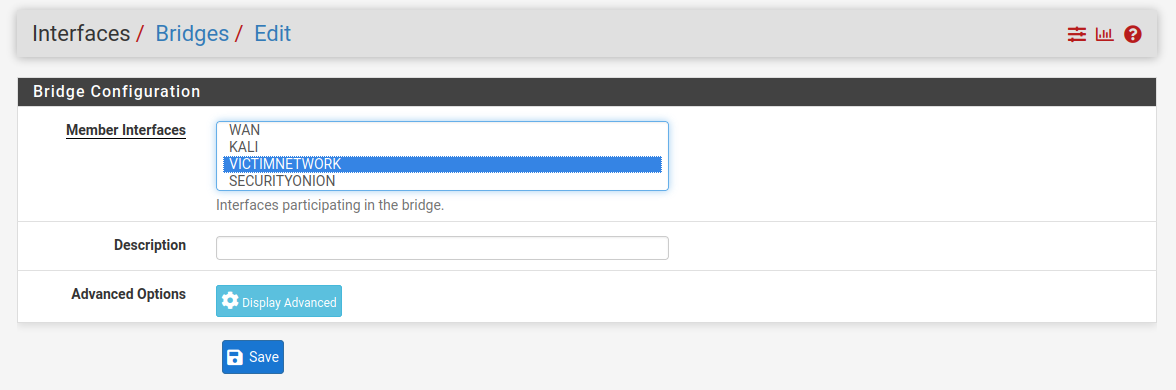
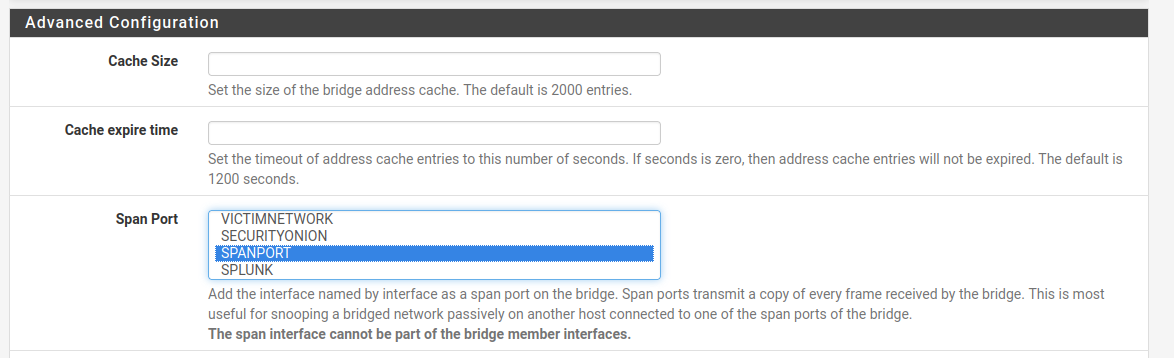
Navigate to Interfaces > Bridges > Add
Add the VICTIMNETWORK as a member interface for the bridge.
Next, select "Display Advanced" and select SPANPORT as the span port. This will allow the frames received by the bridge from the VICTIMNETWORK to be copied to the span port. The frames will then be sent to Security Onion on EM4/VMNET5.
Save the new interface.
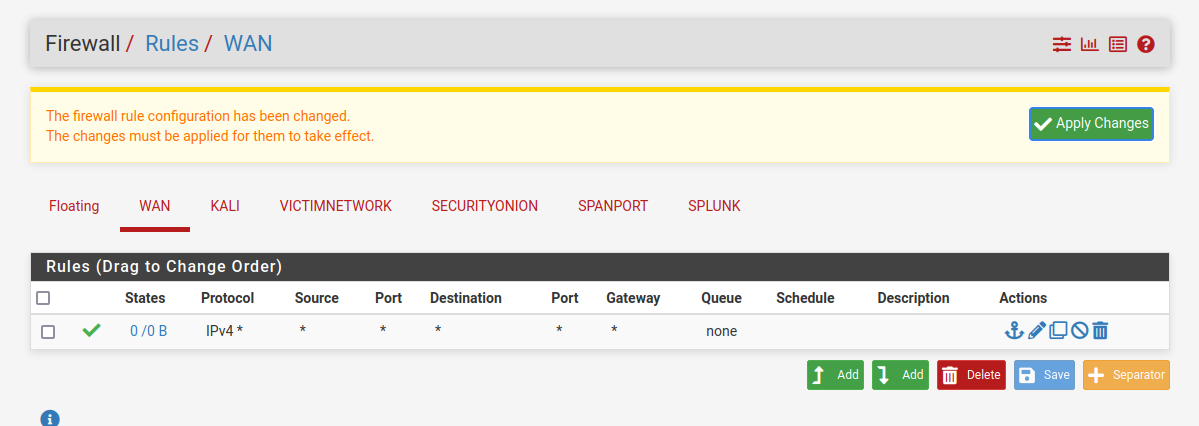
Next, create a rule in the firewall that will allow any protocol to pass through. This will create a "vulnerable" rule so alerts can be generated.
Navigate to Firewall > Rules > WAN > Add
Ensure the action is set to Pass on the WAN and allow Any protocol.
Create the same rule for Security Onion.
### Part 2 - Security Onion
Security Onion is an open-source platform designed for network security monitoring and intrusion detection. It incorporates various security tools, including intrusion detection systems (IDS), network security monitoring (NSM), and log management, into one platform.
{% embed url="" %}
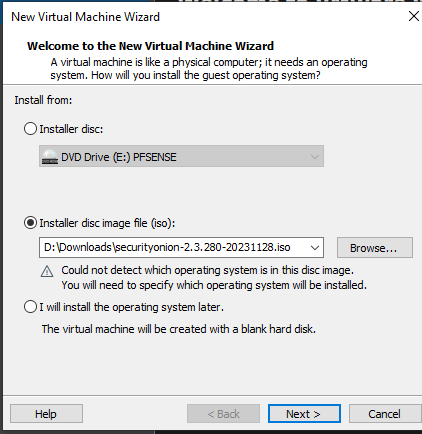
Create a new VM using the Security Onion iso file.
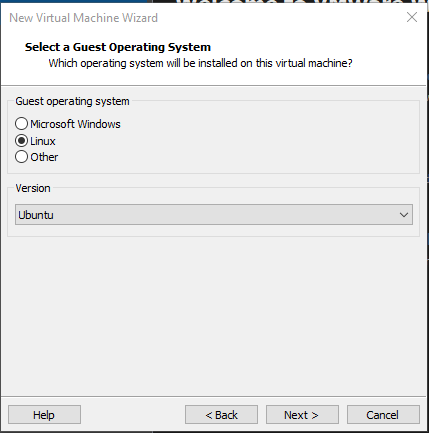
Select the Operating System.
Specify the disk size.
Security Onion hardware requirements can be found below:
{% embed url="" %}
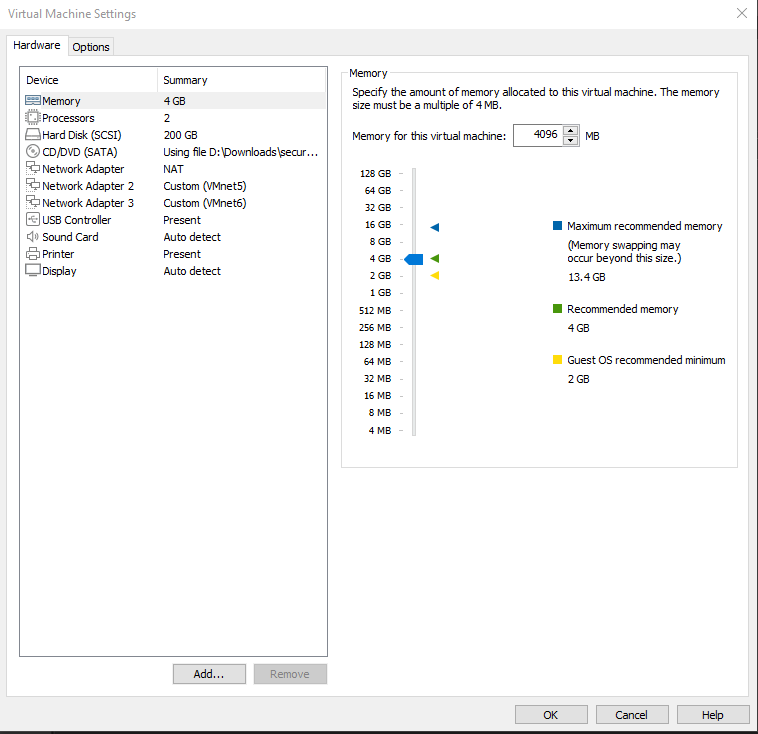
In the hardware setup wizard, add 2 network adapters assigned to VMnet4 and VMnet5.
Increase the Memory. I increased it to 4GB.
Power on the Security Onion VM and go through the setup.
Select Yes
Select Install
Select EVAL
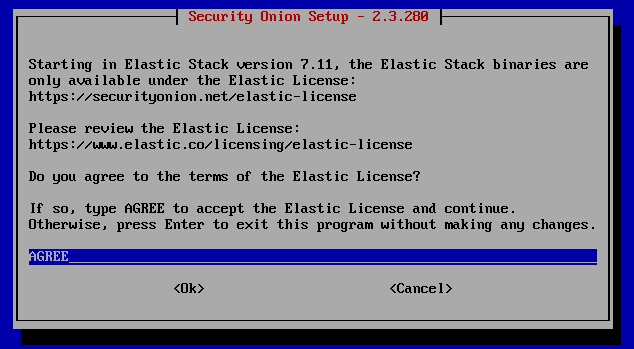
Agree to the license
Select STATIC for the management interface
Use ens33 for the NIC
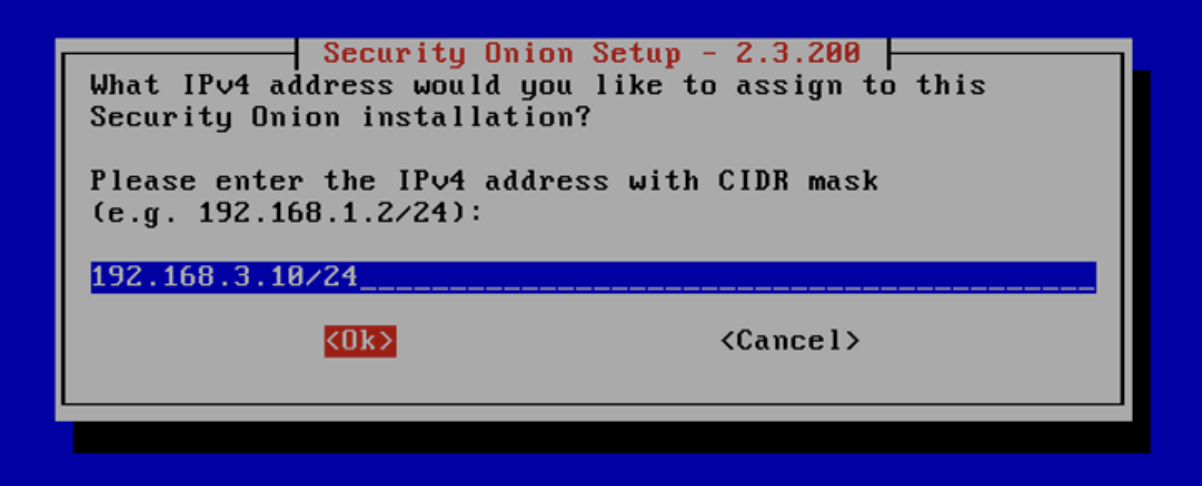
Set the IP to 192.168.3.10/24
Select Standard
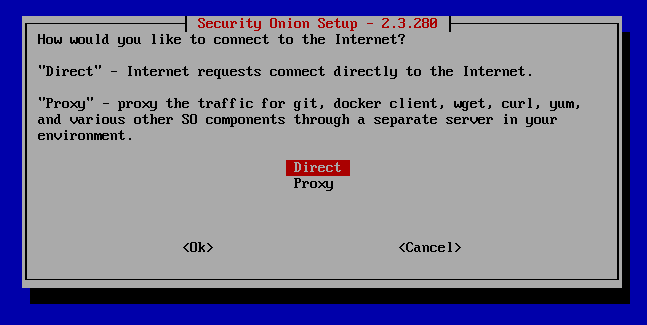
Select Direct for internet connectivity.
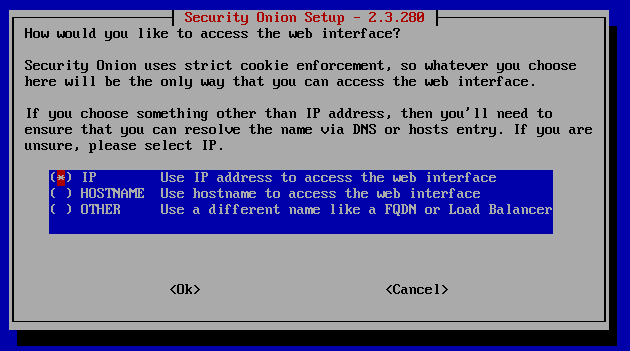
Select IP
This will allow the web interface to be accessed through an IP address.
After this window, you will be prompted to enter an email address and password to access the web interface.
Use the default for the NTP server
Select No
An Ubuntu machine will be created to use for access to the web interface.
On the summary page, review the configuration and select Yes if everything looks correct. Take note of the management IP.
#### Security Onion Web Interface
Next, download an Ubuntu Desktop iso file and create a new VM.
{% embed url="" %}
Once complete, navigate to the CLI and run `ifconfig` command to get the IP address.
If there is an error, it is possible that net-tools have not been downloaded. Run `sudo apt install net-tools`
Take note of the IP address. It should be an IP from the VMware DHCP server since the machine is on the VMware NAT.
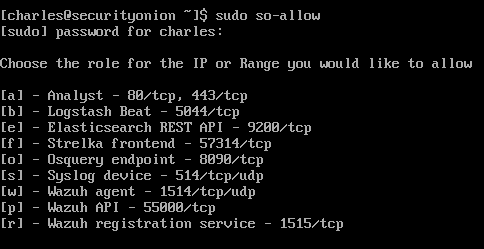
Return to Security Onion and run `sudo so-allow`
Select option \[a]
Enter the IP address of the Ubuntu VM.
Navigate back to the Ubuntu VM and open Firefox.
Go to the IP of the Web Interface for Security Onion.
Select Advanced
Select Accept the Risk and Continue
At the login screen, enter the credentials that were created during the Security Onion setup.
We're logged in!
Security Onion has several features built-in (e.g., Network Security Monitoring, IDS, Logging, Packet Capture, Alerting, Reporting, and more). Visit the link below to find out all of its capabilities:
{% embed url="" %}
### Part 3 - Windows
#### Active Directory / Domain Controller
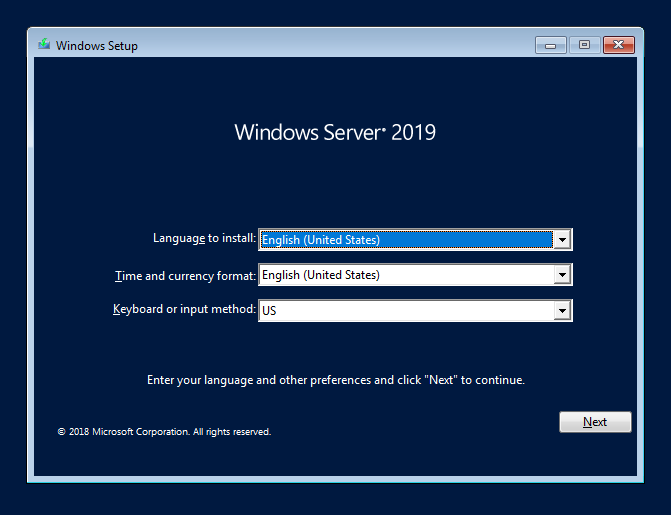
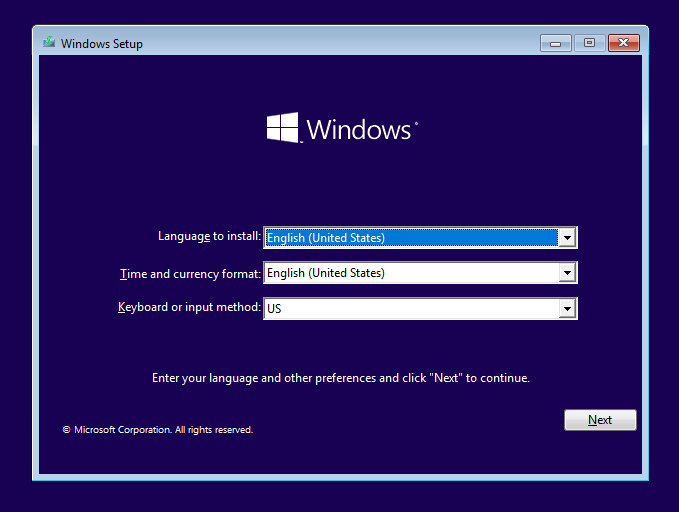
Download the Windows 2019 iso image and create a new VM.
{% embed url="" %}
In the Hardware settings, add another network adapter for VMnet4.
Start the Windows Server VM.
Select the Windows Server 2019 Standard Evaluation (Desktop Experience)
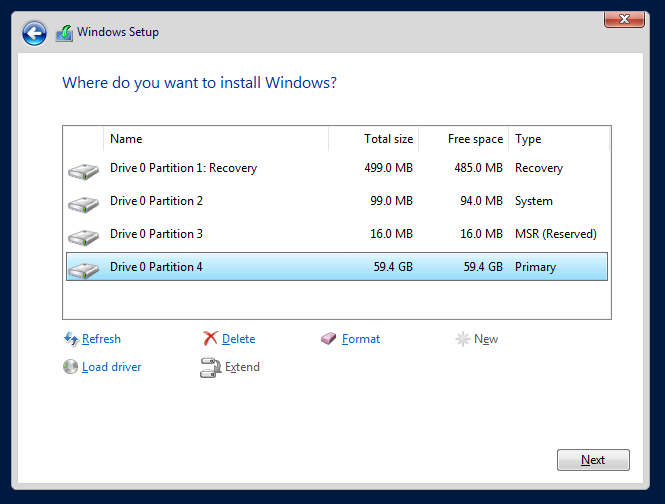
Click Custom Install and Partition 4 (Primary)
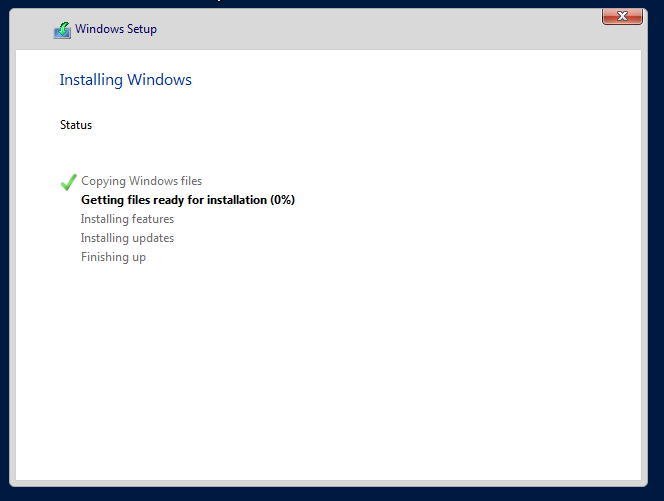
Let Windows Install.
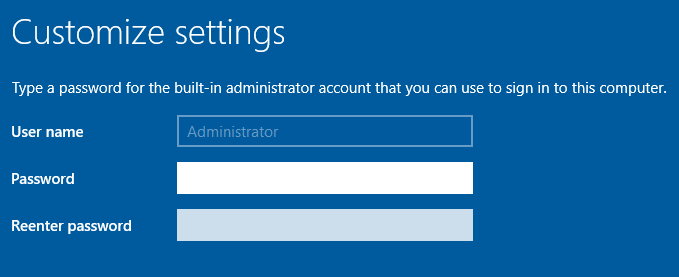
Enter a Password for the Administrator account.
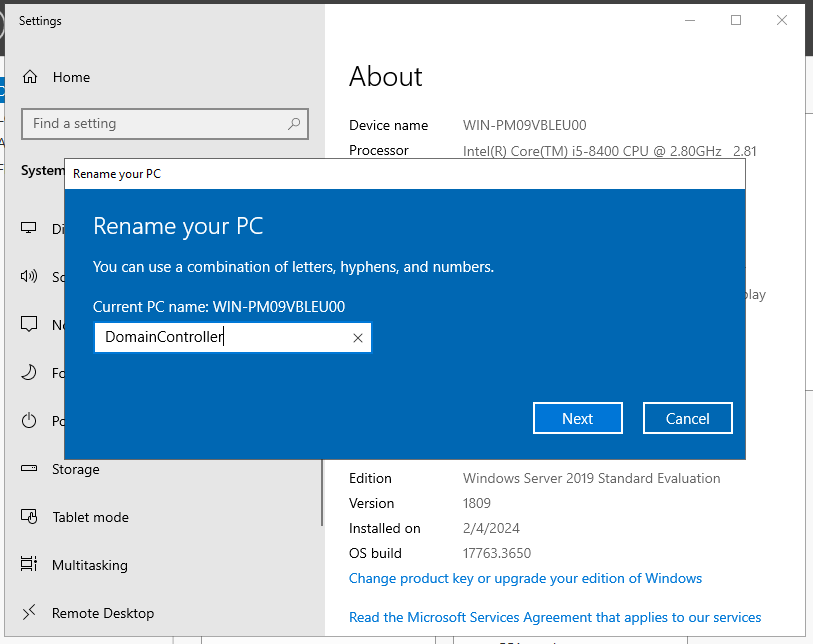
Name the PC.
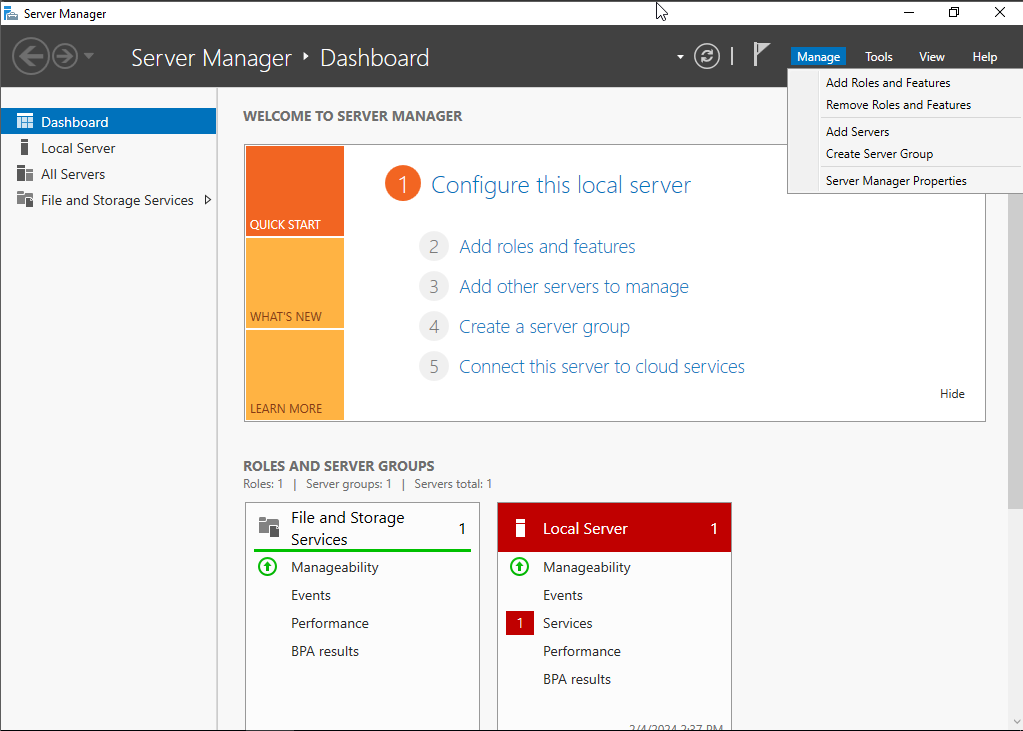
Within Server Manger, provision services for the Domain Controller.
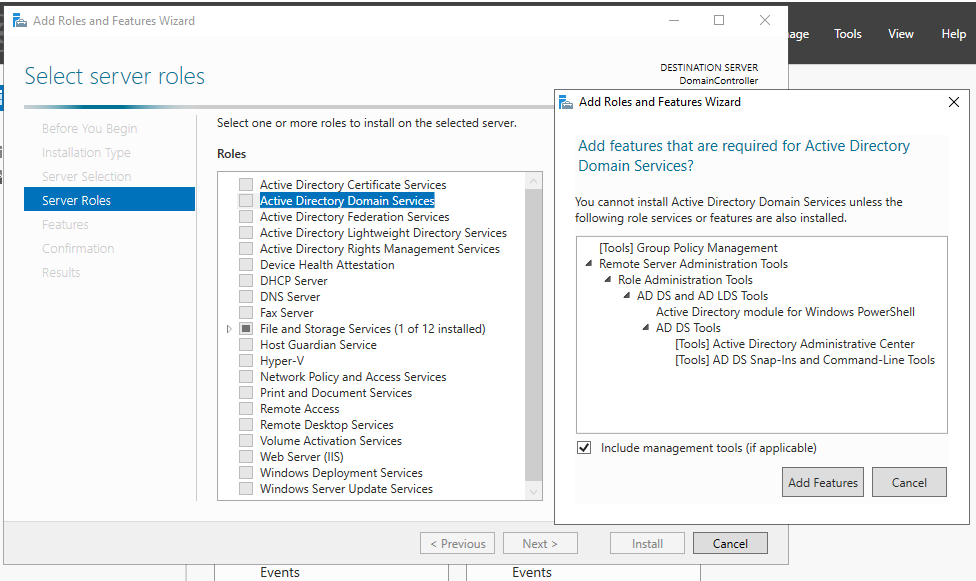
Select Manage in the top ribbon and select Add Roles and Features
Within the Wizard, select Active Directory Domain Services and then install.
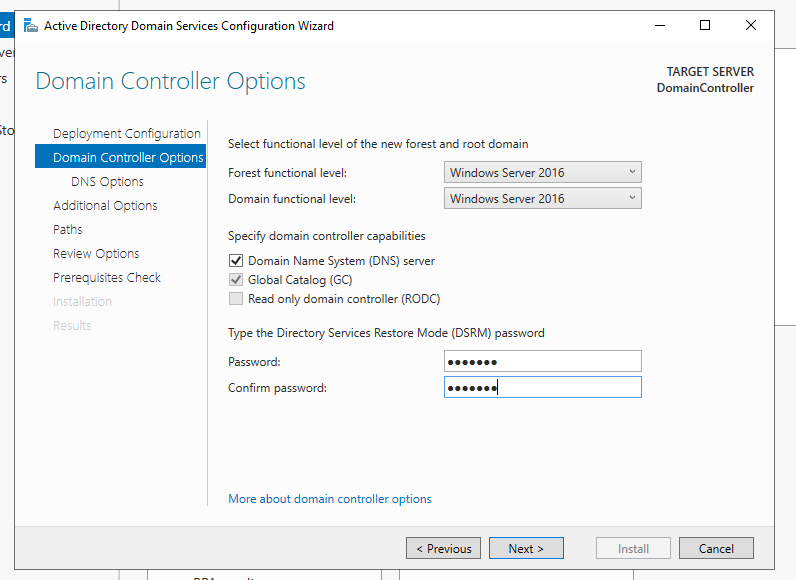
Once the installation is complete, there will be a notification to promote the server to a domain controller.
Click through the wizard and create a domain name for the forest.
Set the password.
Ensure the domain name is correct.
Select Install and reboot the server.
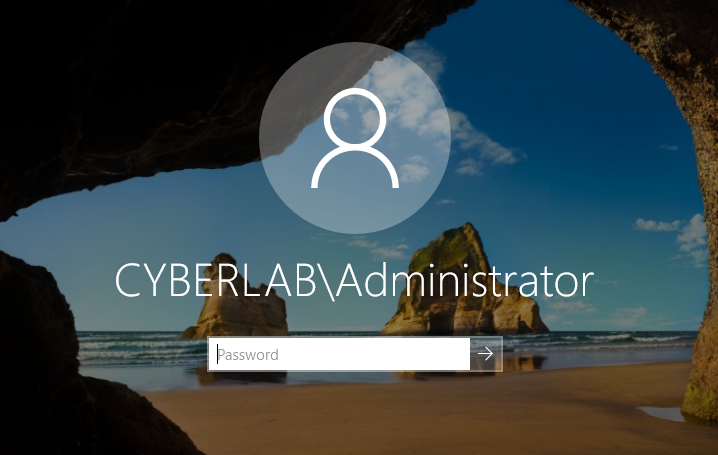
After the domain controller is rebooted, log in.
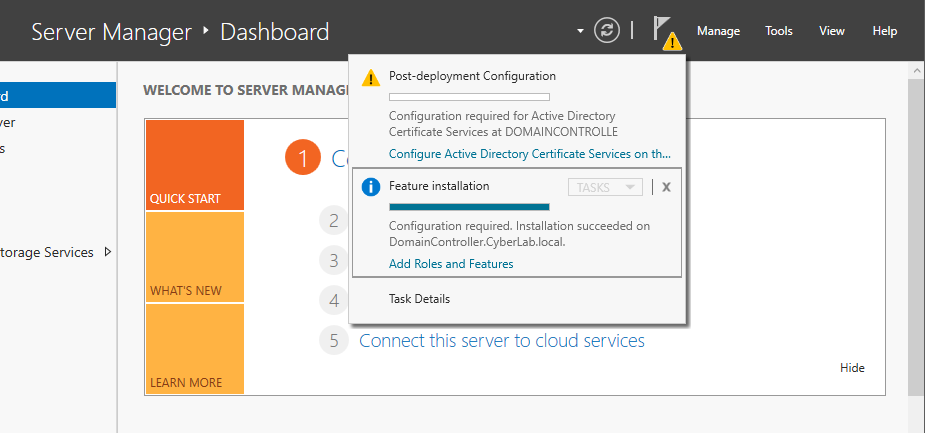
In Server Manager, navigate to Manage > Add Roles and Features
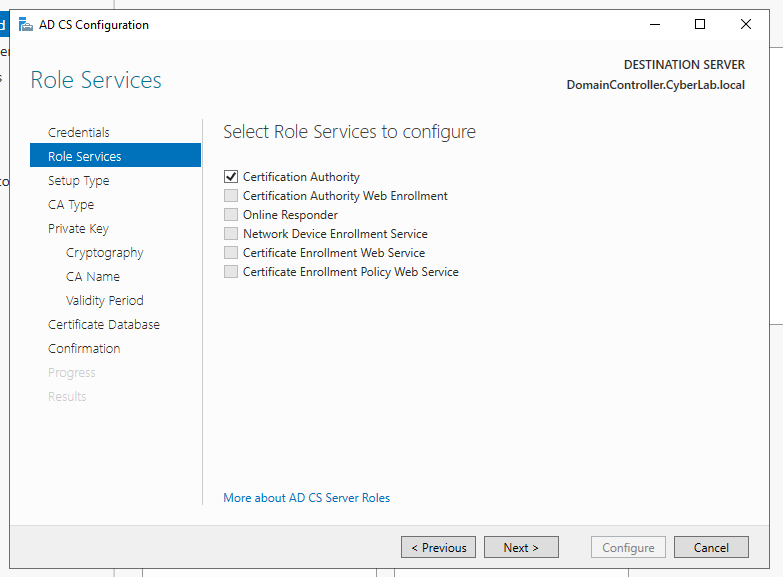
Within the wizard, select Active Directory Certificate Services
Go through the steps and install.
There will be a new notification regarding Active Directory Certificate Services.
Click Change and enter the credentials.
Select Certification Authority
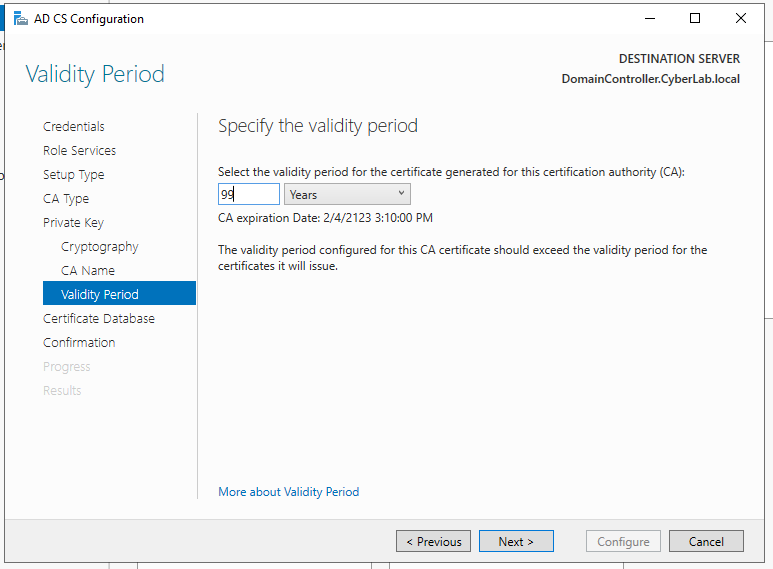
For the purpose of this lab, set the validity period to 99 years.
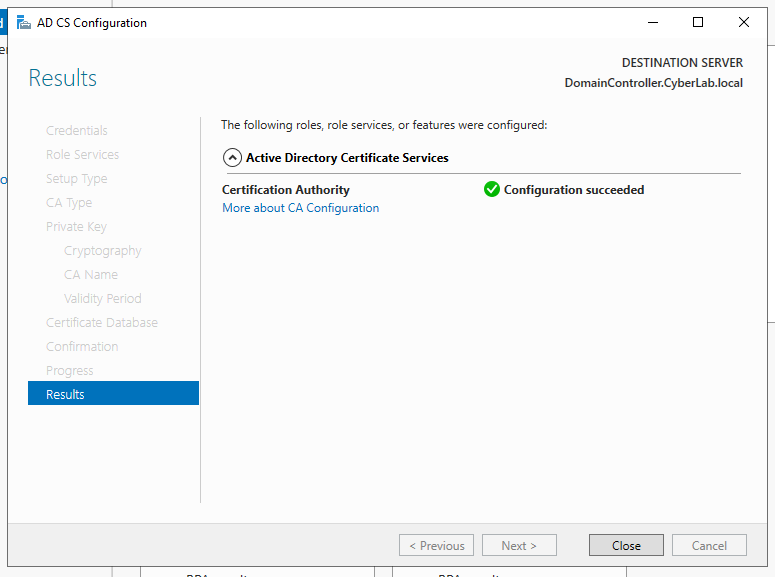
Complete the configuration and restart the server.
Adding Users to AD
Navigate to Tools > Active Directory Users and Computers
Right-click on the Users folder > New > User
Create a new user and set their password.
In the Windows search bar, search for Windows Defender Firewall.
Turn off all settings as pfSense will be used as the default gateway.
Navigate to the Control Panel > Networks and Sharing Center
Change adapter settings > right click Adapter > Properties > IPV4
Enter the configurations in the screenshot below:
#### Windows 10 Machine
Download the Windows 10 iso and create a new VM.
In the Hardware settings, add a network adapter assigned to VMnet4.
Start the VM and begin the installation process.
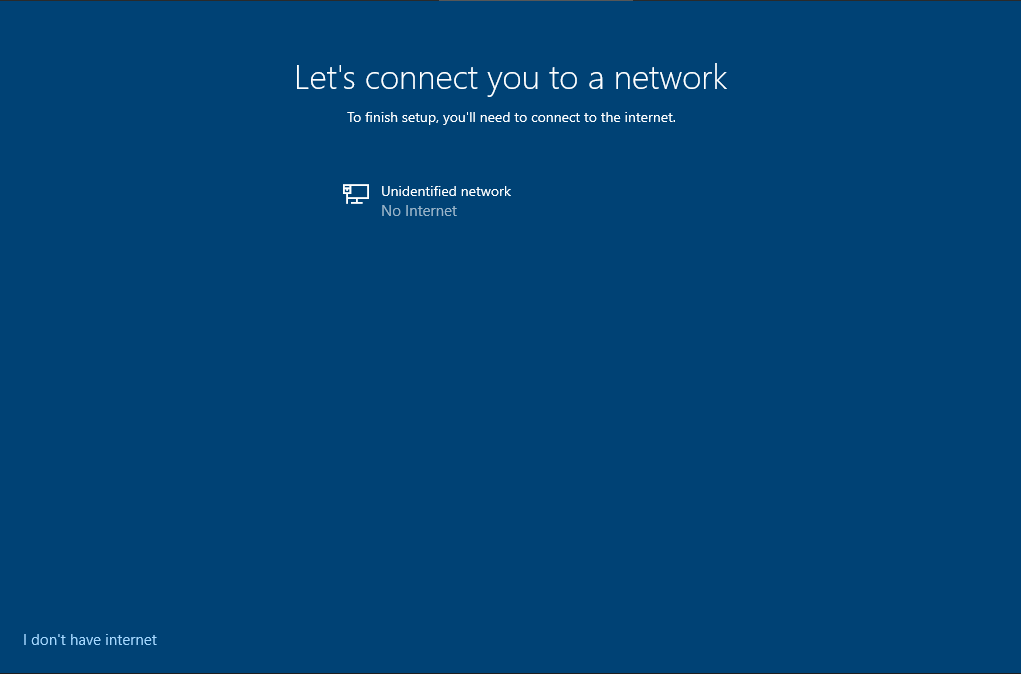
When prompted to connect to a network, select the "I don't have internet" at the bottom left of the screen.
Continue with the limited setup.
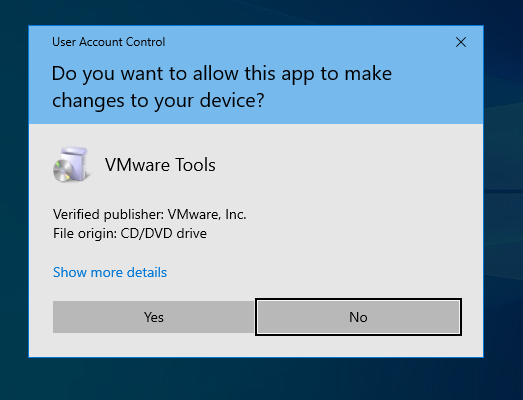
Once the Windows install is complete, install VMware tools.
VMware tools provide additional features for guest operating systems.
Select Yes to allow VMware tools to make changes.
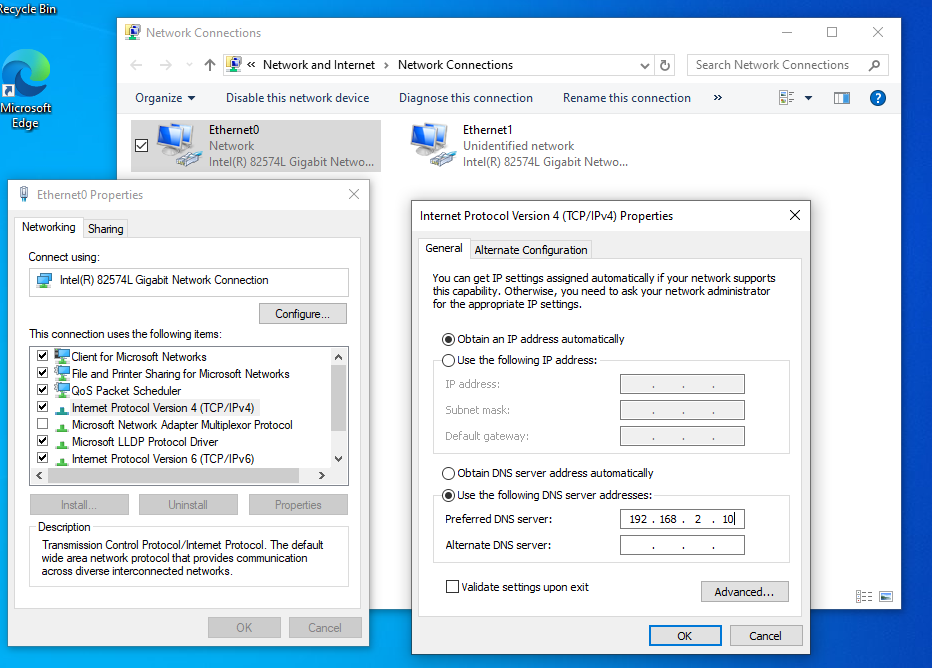
Naviagte to Settings > Network Connections > right click Ethernet0 > Properties
Configure the IPV4 settings like the screenshot below:
The next step involves adding the domain controller to the DNS server in pfSense.
Navigate to the pfSense web interface > Services > DHCP Server > VICTIMNETWORK
Add the domain controller under DNS Servers.
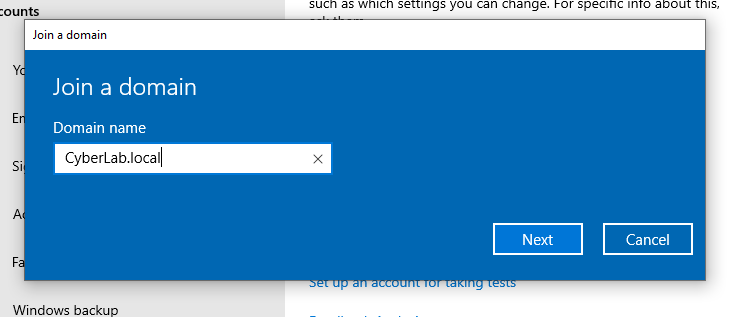
Next, search for "domain" in the Windows search bar.
Click Connect
Enter the domain name that was set in the domain controller (CyberLab.local).
Enter the username and password for the Admin account.
Check to see if the Windows 10 machine was added to the domain.
In Server Manager, navigate to Active Directory Users and Computers > CyberLab.local > Computers
We can see that the Windows 10 machine was successfully added.
### Part 4 - Splunk
#### Ubuntu Server
Splunk will be hosted on a Ubuntu server and used for security monitoring.
Download the Ubuntu server iso file and create a new VM. Go through the normal installation steps.
For this server, I configured the memory to 4GB, provided 100GB of Hard Disk storage, and added a network adapter for VMnet6.
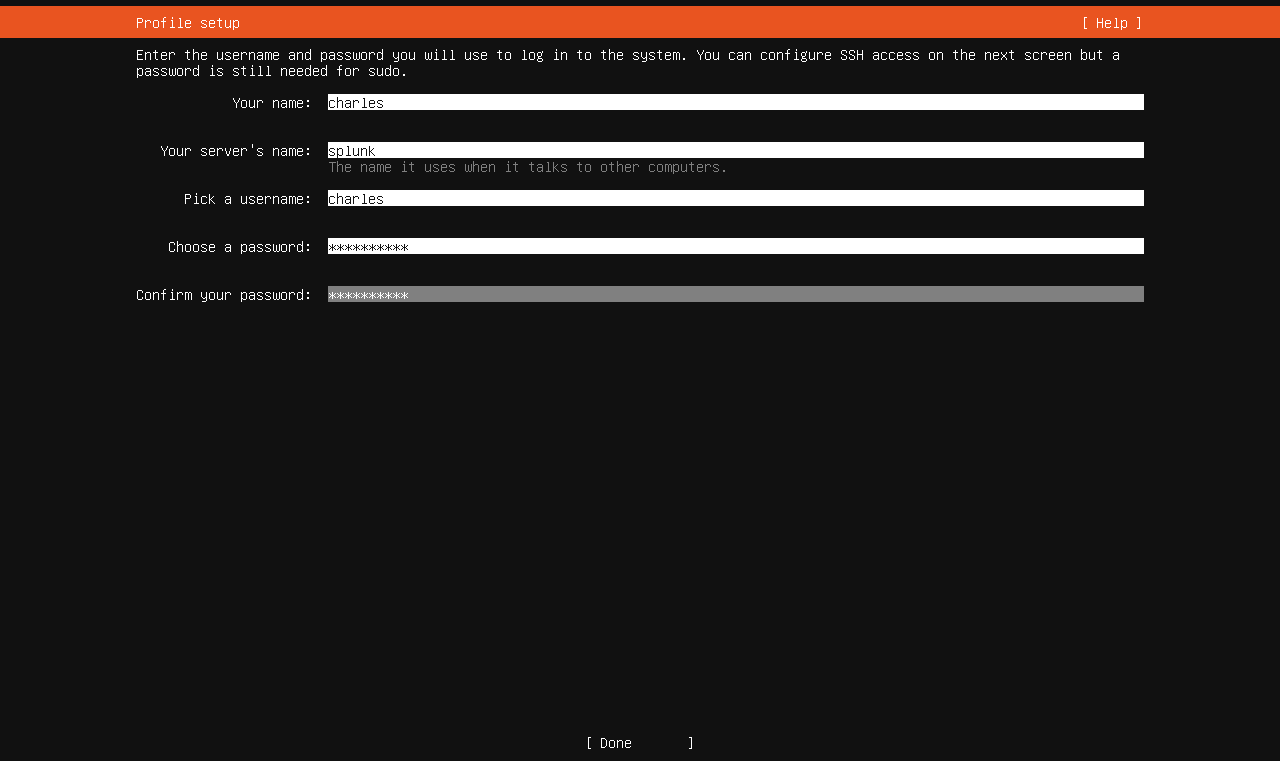
Create a Profile for the Splunk Server
I opted to install OpenSSH on the server.
{% embed url="" %}
After the VM has completed the installation and reboot process, you should be greeted with the sign-in screen.
There are two options for the Splunk server:
* Accessing the AnalsytVM using SSH
* Installing the Ubuntu Desktop GUI on the server
This lab will use option 2 and I will be installing the GUI.
To install the GUI, follow the steps below:
Install tasksel
```
sudo apt install tasksel
```
Install the Ubuntu desktop GUI
```
sudo tasksel install ubuntu-desktop
```
Reboot the VM
```
reboot
```
After rebooting the VM, the GUI should be installed.
Open up Firefox and navigate to Splunk
{% embed url="" %}
\*Note: if your machine does not have Firefox installed, you will need to install it.
```
sudo apt-get install firefox
```
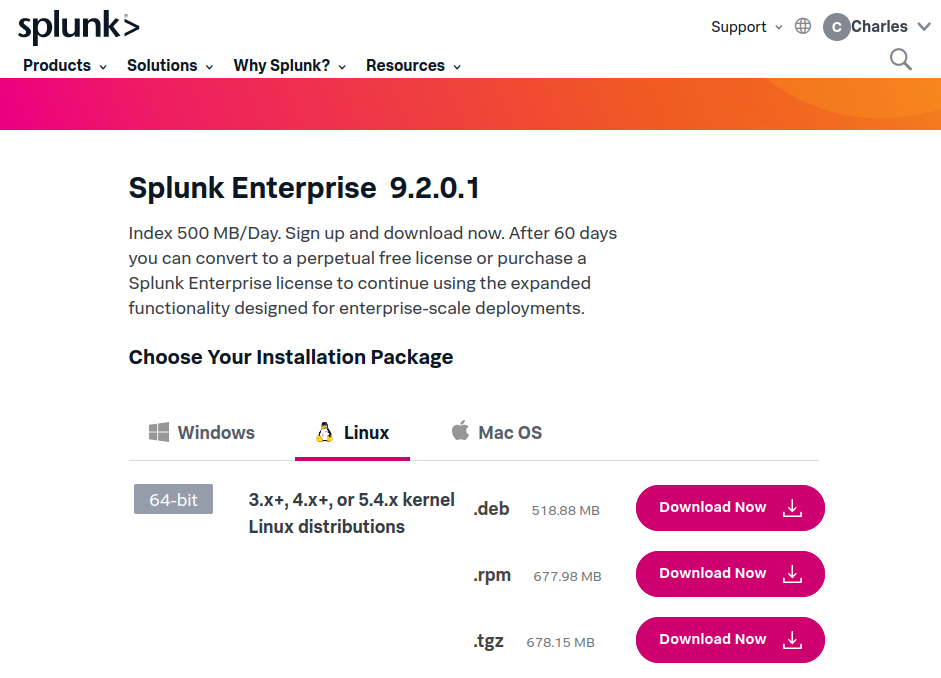
Be sure to download the Enterprise version and not the Cloud version of Splunk. Splunk Enterprise allows for a 60-day free trial.
Download the .tgz file
After the download is complete, navigate to the Downloads folder and unzip the file.
```
tar -xvzf splunk
```
Navigate to the splunk folder and run `./splunk start` to start the instance.
Enter a username and password of your choice.
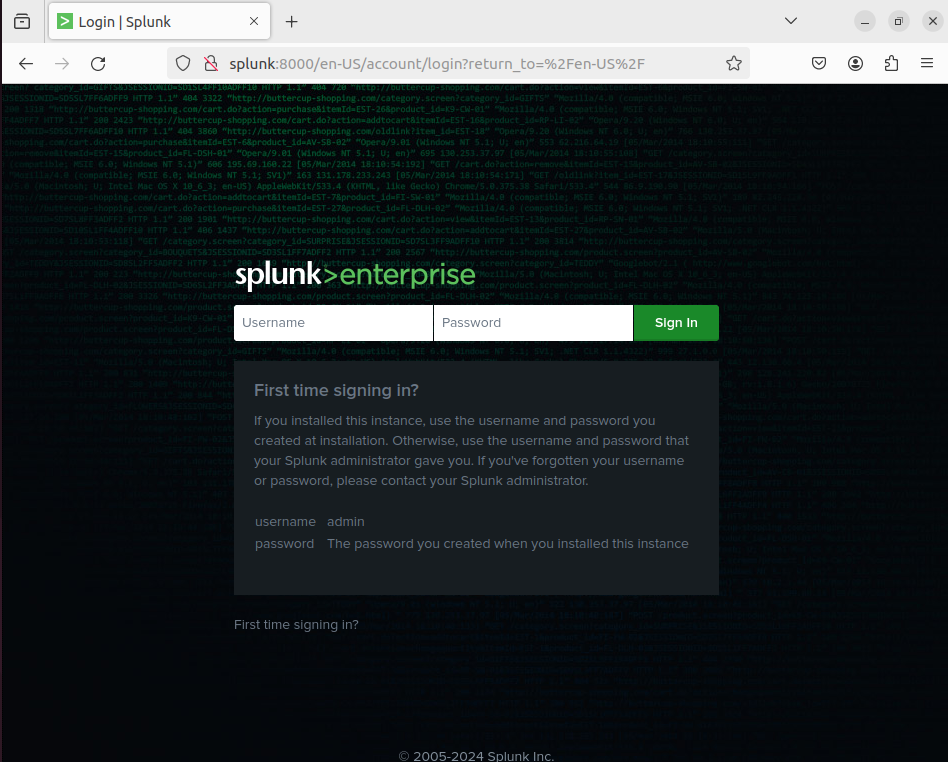
Navigate to the Splunk web interface:
Login with the credentials that were just created in the previous step.
#### Ingesting logs into Splunk
In this section, logs will be sent to Splunk from the domain controller. A Splunk universal forwarder will be installed on the domain controller and an be used to forward logs to the Splunk instance.
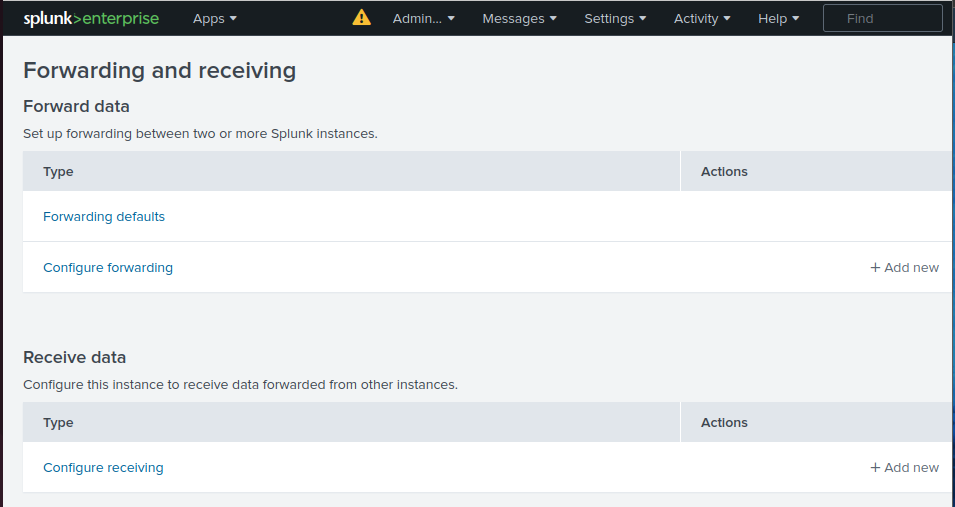
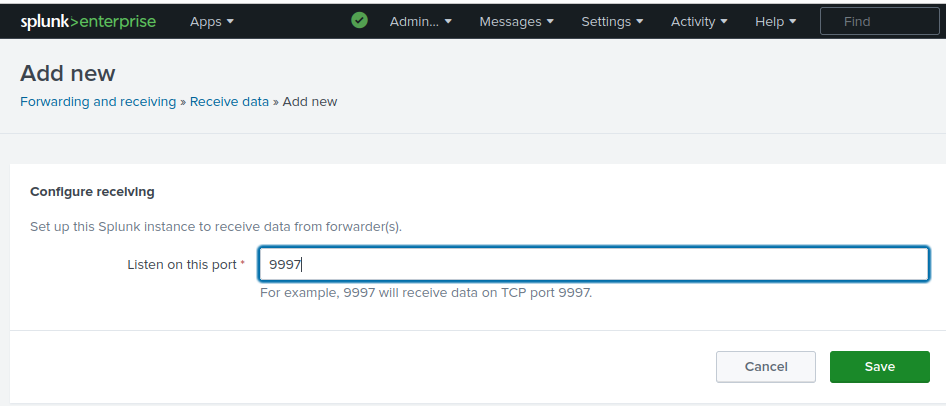
From Splunk home screen, navigate to Settings > Forwarding and receiving
Select Configure receiving under Recieve Data.
Enter port 9997 and click save.
This will allow inbound connections from the Universal forwarder on port 9997.
Next, navigate to Settings > Indexes
Indexes are repositories of raw event data where it is transformed into searchable events.
A new index will need to be created for the Windows events from the domain controller.
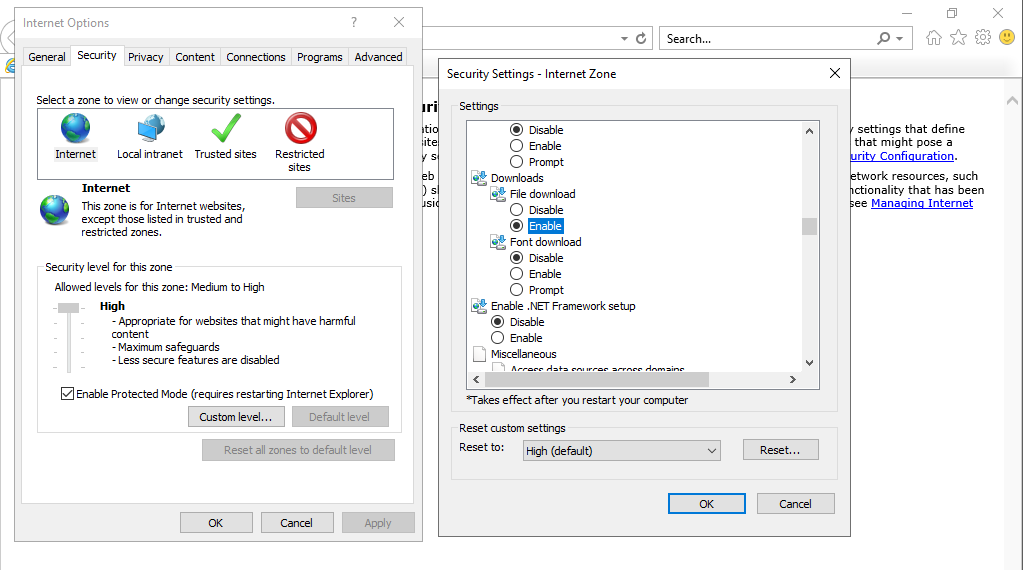
Navigate to the domain controller.
Internet Explorer may be locked down and downloads may be disabled. To enable downloads, go to Internet Options > Security Settings > scroll down to Downloads > Enable
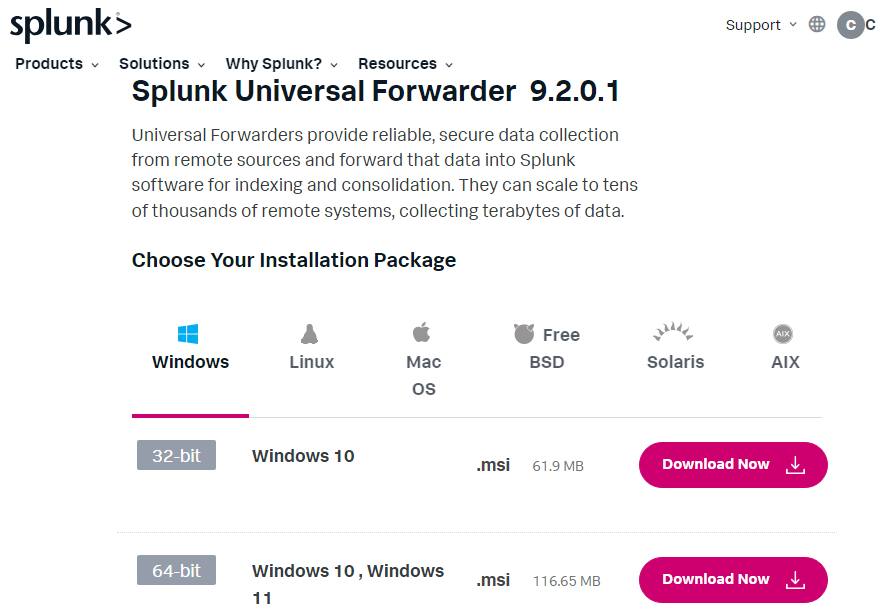
Download the Splunk Universal Forwarder for Windows below:
{% embed url="" %}
Once the download is complete, run the install.
When prompted for the Hostname or IP, enter the Splunk server IP and the default ports (8089 & 9997).
After the Universal Forwarder install is complete, navigate back to the Splunk instance.
Settings > Add Data > Forward
Select the Windows Domain Controller
Enter a New Server Class Name
Select windeventlog > Review > Submit
From here, we can see that the event logs are populating in Splunk.
Sources for Splunk Search Processing Language (SPL)
{% embed url="" %}
{% embed url="" %}
This concludes the setup of the Cyber Home lab. The lab can be used for working on detection, creating rules, SIEM practice, attack scenarios, AD practice, and much more!
### Lab Troubles
Following this lab step-by-step, I discovered there were IP issues with the machines. Some machines were on the same subnet as the WAN and not segmented properly. After some research online, I discovered that others had the same issue. By following the steps provided by Jv Cybergaurd, I was able to address the networking issue. Jv Cybergaurd provides step-by-step instructions on troubleshooting and fixing the issue here:
{% embed url="" %}